Skin constraints for different proportions
March 11th, 2020
Skin constraints are a great way to increase the expressiveness of your skeletons. In this blog post we'll explore how to use skin constraints to alter the proportions of a character using the Mix-and-match example project.
The Mix-and-match project is part of our set of example projects that come installed with Spine. The project can be found by opening the welcome screen, then clicking Examples. Alternatively, the project can be downloaded from the example page. The example page contains detailed explanations of the project's inner workings. Go ahead and open the project in Spine!
The goal of this exercise is it to create a skin variation that not only affects the set attachments, but also the proportions of the character. Specifically, we want the skin to make the character smaller. The technique described below can of course also be applied to create taller, skinnier, or fatter characters, and anything in between.
Constraint setup
Let's get started! With a change in proportions, the location of the hips also changes relative to the root of the character. This can be done via a transform constraint.
Select the hips bone and create a new transform constraint with the root bone as target. Call the constraint small-hips.
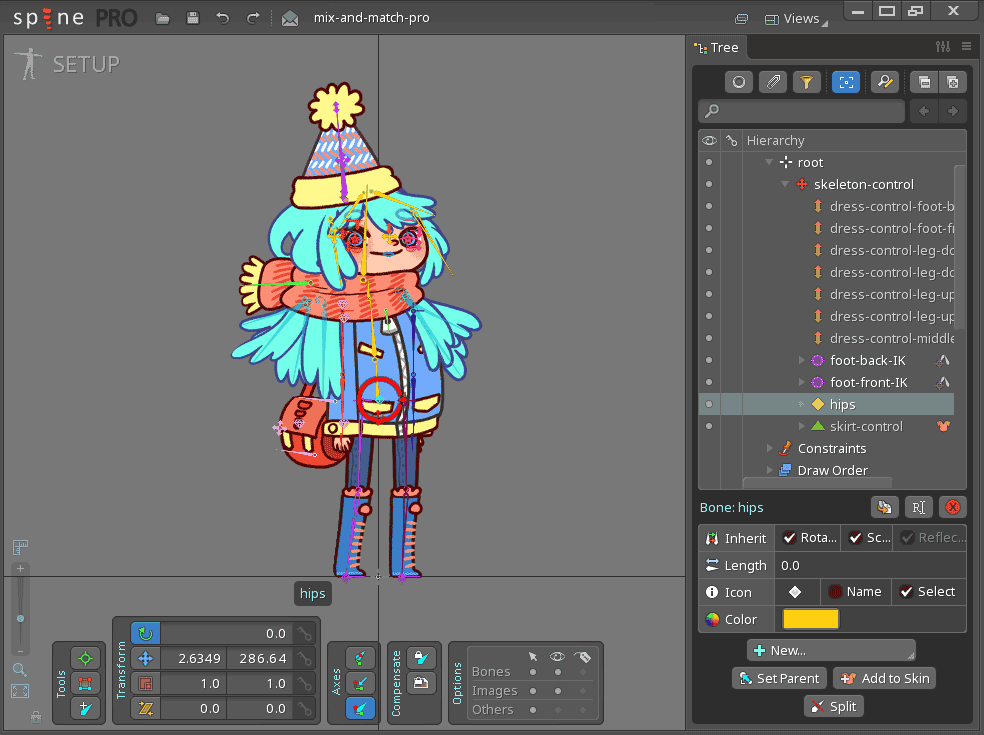
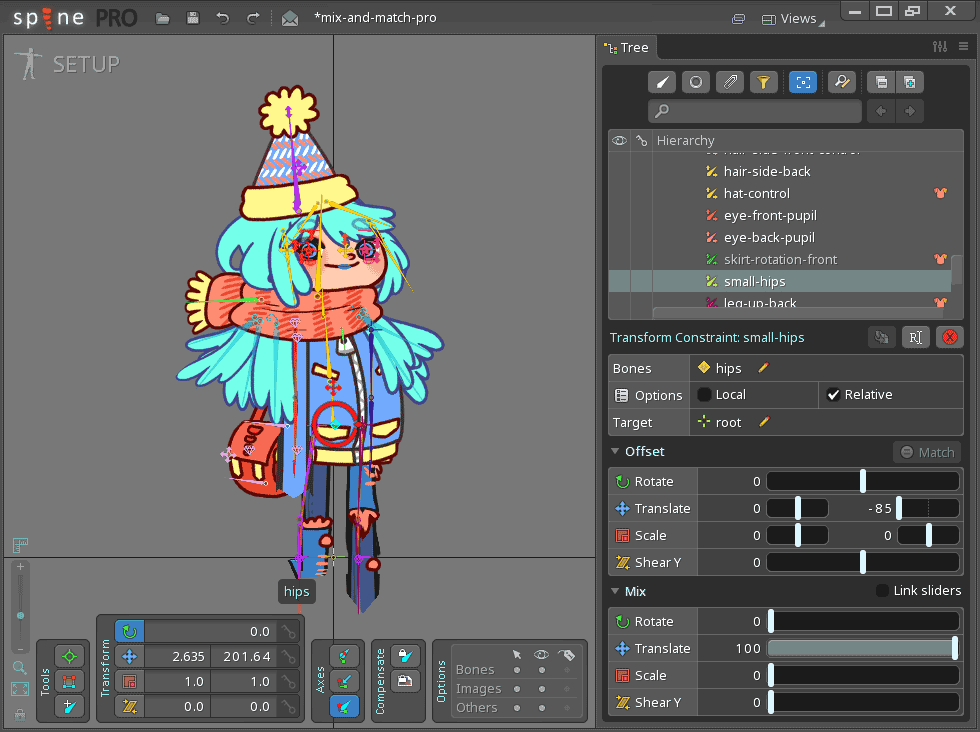
With the small-hips constraint selected in the tree, check the Relative option and set the translate mix to 100. The constrained hips bone will now follow the translation of the root bone. The hips bone will be offset relative to the root bone by the translate offset set on the small-hips constraint.
The legs of the character will not look nice after the creation of the small-hips constraint. This is due to the constraints order. We want the small-hips constraint to be applied before all other constraints. To fix it, drag the small-hips constraint to the very top of the list under the Constraints node in the tree.
To see the effect of the constraints, modify the translate offset on the small-hips constraint, e.g. set it to -85 on the y-axis to make the character squat.
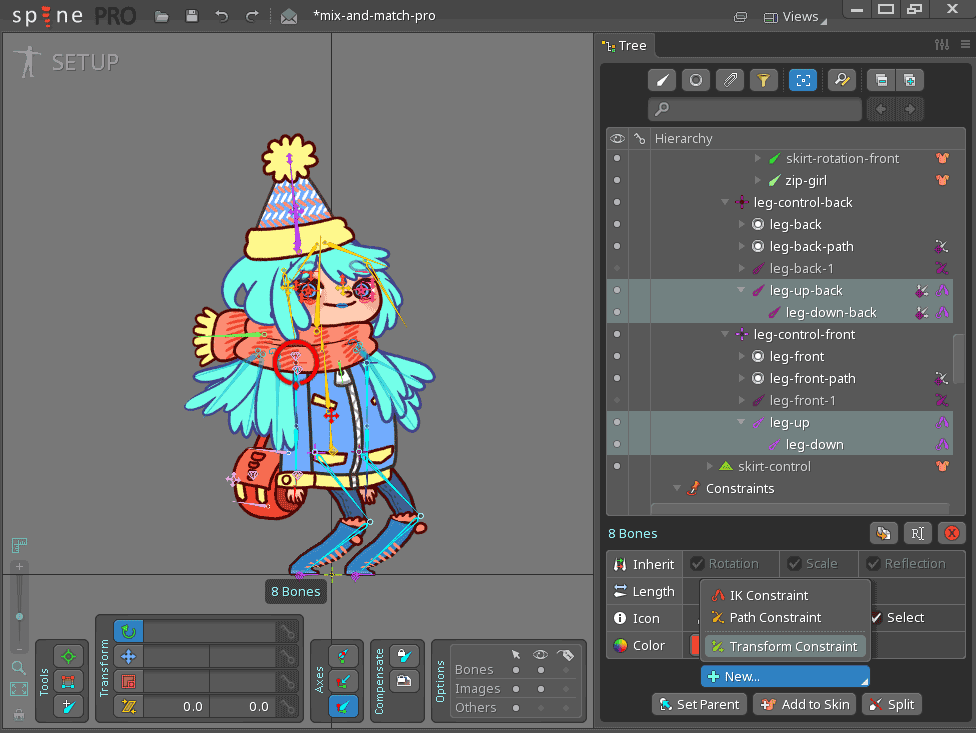
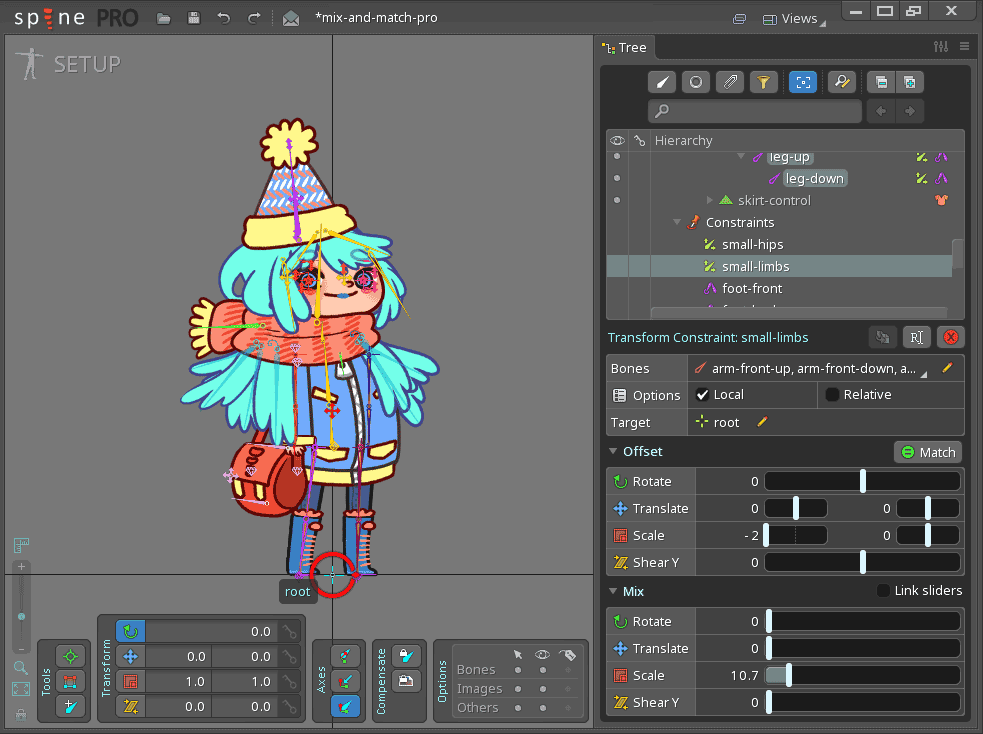
It is time to turn our character into a tiny, adorable human! Select the 8 bones called arm-front-up, arm-front-down, arm-back-up, arm-back-down, leg-up, leg-down, leg-up-back, and leg-down-back, as in the image above.
Next, create a new transform constraint called small-limbs with the root bone as its target.
As before, we need to fix the constraint order. Drag the small-limbs constraint right below the small-hips constraint under the Constraints node.
In order to make these 8 bones smaller, check the Local option and set the scale mix to 10.7. We can then set the offset scale value on the x-axis such that the character's legs straighten out. A value of -2 works nicely.
Skin constraints
We can now add the small-hips and small-limbs constraint to a skin, which means the constraints will only be applied when that skin is active.
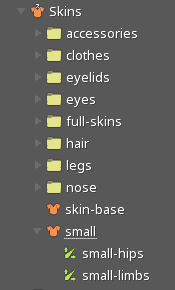
Create a new skin and name it small. Drag and drop the small-hips and small-limbs constraint nodes to the small skin under the Skins node.
Alternatively, first select the small skin, press the Add to skin button, select the constraints small-hips and small-limbs, then press the button Add to skin again to complete the process.
Done!
To create a tall, skinny, or fat variation, simply repeat the above process. Each variation will require its own constraints and skin. Multiple skins can be active at the same time using the Skins view, so you can combine skins that change proportions with other skins that change attachments. You could even have separate skins for changing the proportions of the legs, arms, torso, etc and combine them however you like.
This simple technique can be applied to more than just proportions! It is a powerful way for skins to affect not just which attachments are visible, but the skeleton's bone transforms.
Discuss this blog post and share your experiments on the Spine forum.