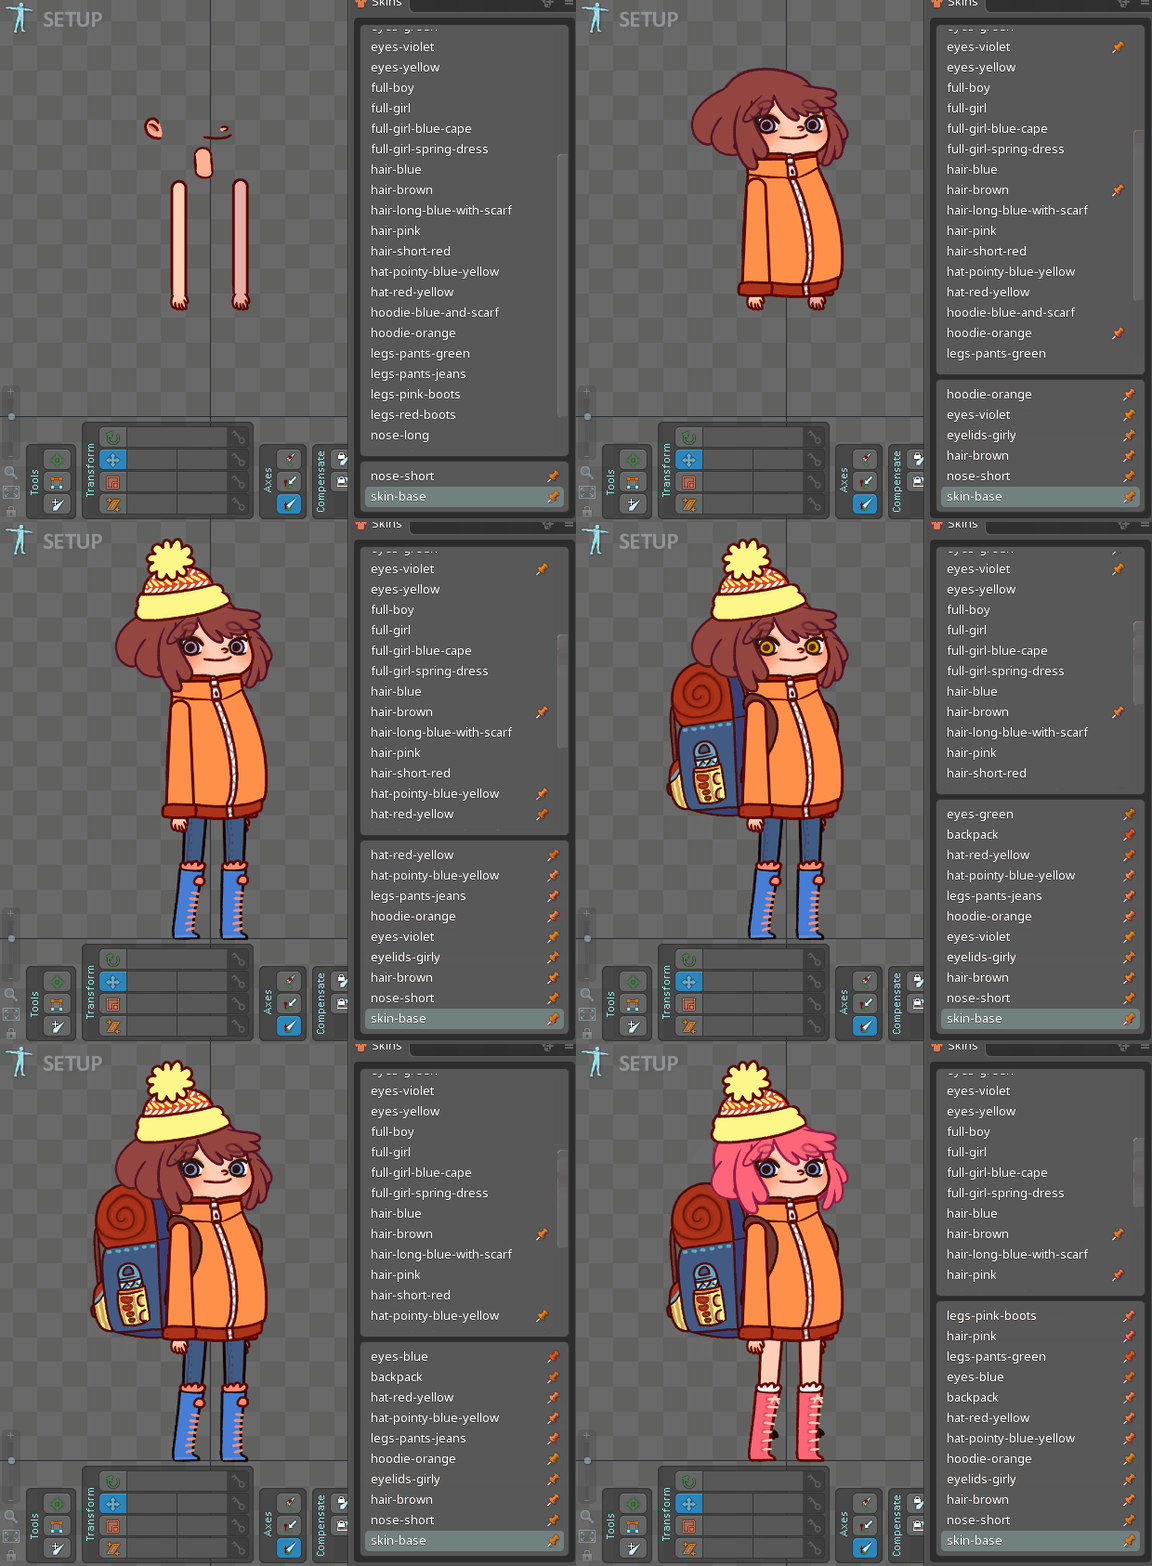
Skins view
The skins view allows multiple skins to be visisble at the same time in the viewport. It is especially useful to work on characters that mix and match skins for various items or body parts.

The new skin icon to the right of the Skins tab creates a new skin.
Skin list
At the top of the skins view, all skins are listed for the currently selected skeleton, just as they appear in the tree. If a project has multiple skeletons, a select box indicates for which skeleton the skins are being shown.
Clicking a skin sets it as the active skin. This is identical to clicking the visibility dot for the skin in the tree. Only attachments for the active skin can be selected or edited in the viewport. The active skin is always visible and if not pinned it is considered to be applied last.
Double clicking a skin opens the rename skin dialog. Right clicking a skin selects it in the tree, without making it active.
Pins
Each skin has a pin at the right edge of the skins view when the mouse is over the skin. When the pin is clicked, it turns orange to indicate the skin is pinned and the skin appears in the pinned skins list. Clicking the orange pin will unpin the skin.
Pinned skins
Pinned skins are shown in a list at the bottom of the skins view. All the pinned skins are visible in the viewport at the same time.
The pinned skins are applied starting with the bottommost skin first. If the active skin is not pinned, it is applied last. When two skins have attachments for the same skin placeholder, the skin higher in the pinned skins list will override the lower skin.
The pinned skins can be dragged to change the order they are applied. Clicking the orange pin will unpin the skin and remove it from the list.
